Showing posts with label South Indian Cuisine. Show all posts

Friday, June 18, 2021

Vegan GiNNada KaDubu (Jun KuDumulu)


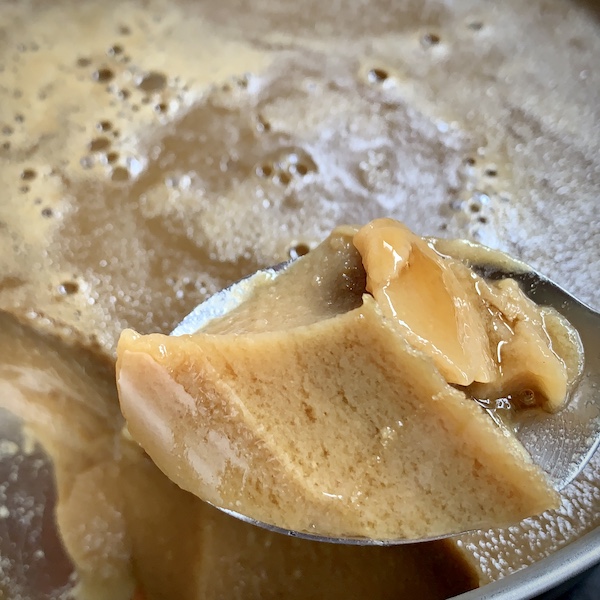
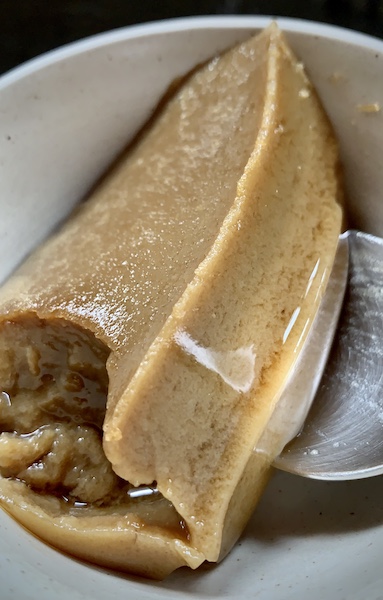
Close up of a sweet called GiNNa in Kannada. This is the vegan, cruelty-free version. Rectangular slice, brown in colour, jelly texture. In an off white bowl and a bit of steel spoon showing.

 🍮 GiNNa ಗಿಣ್ಣ is a dessert traditionally made out of Jaggery and Colostrum. Let me describe these exotic ingredients to you...

Freshly extracted sugarcane juice is boiled for a long time in large, heated vats. It gets caramelised into a delicious sweetener. That’s Jaggery. 🤤

A female is pregnant for a long time. Soon after she gives birth, an antibody rich secretion comes out of her mammary glands to feed her baby. That’s Colostrum. 😳

Now imagine what kind of a sick, twisted mind decided to put the two together and invent dessert.

Someone sees a cow give birth and says, “hey, let me push that wee baby calf aside, squeeze the very first milk out of his mother’s udders, and cook it with Jaggery.”

And then it just becomes a special, gourmet recipe, passed on from generation to generation.

It’s bloody scary how easy it is for us humans to commodify and normalise the use of things which we have absolutely no business taking! 🤯😨

Sadly, as a kid, GiNNa was one of my favourite desserts.

Usually I’m not the kind of vegan who feels guilty about my past food choices. What’s done is done. I’m just grateful I make better choices now.

But GiNNa is the one dessert from my past that breaks my heart. 💔😢

I can’t believe how casually my tastebuds could enjoy something that an innocent new born should’ve been eating. 🐮🐄👩🏽‍🍼

If you still like GiNNa, you don’t have to wait for a cow to give birth and steal her baby’s first food.

Instead, make this Vegan GiNNa anytime you crave it!

Close up of a caramel brown, jelly like dessert being help up with a steel spoon. More dessert in the background. A vegan version of GiNNa (in Kannada), also known as Junnu (in Telegu).
 

1 1/2 L Soy Mylk
15 g Agar Agar Sheet – cut into small strips
1 1/2 C Jaggery

🌻Rinse the agar agar strips
🌹Add to soy mylk and bring to boil
🌻Reduce heat to low and keep cooking, stirring periodically, until the agar dissolves completely (takes 20-30 mins)
🌹Gently stir in the Jaggery and simmer on low heat for a couple of minutes until it dissolves (don’t let the mylk boil!)
🌻Turn off heat and transfer to a tray or individual cups
🌹Allow to cool, then let it sit in the fridge for at least 2 hours
🌻Enjoy cold!

📝 Other plant based mylks work, but fresh, homemade soy mylk gives the best texture
📝 You can use agar agar powder instead of sheets

Wednesday, September 10, 2014

Spicy Peanut Sauce Ice Cream - Vegan MoFo 2014 Day 4


Ack! It's the 10th already and I'm still on my 4th post. I have a lot of catching up to do.

When I decided to do the Ice Cream theme for Vegan MoFo this time, I knew I'd be experimenting with atleast a few "weird" flavours. I mean, where's the fun in just making predictable, sweet ice creams and leaving it at that? :P

So on Sunday I put together a crazy combination of peanuts, chillies, garlic, jaggery and tamarind and turned it into ice cream. It's sweet, spicy, tangy and meant for the adventurous soul. Dudes and dudettes, I present the...
Spicy Peanut Sauce Ice Cream!!! :D

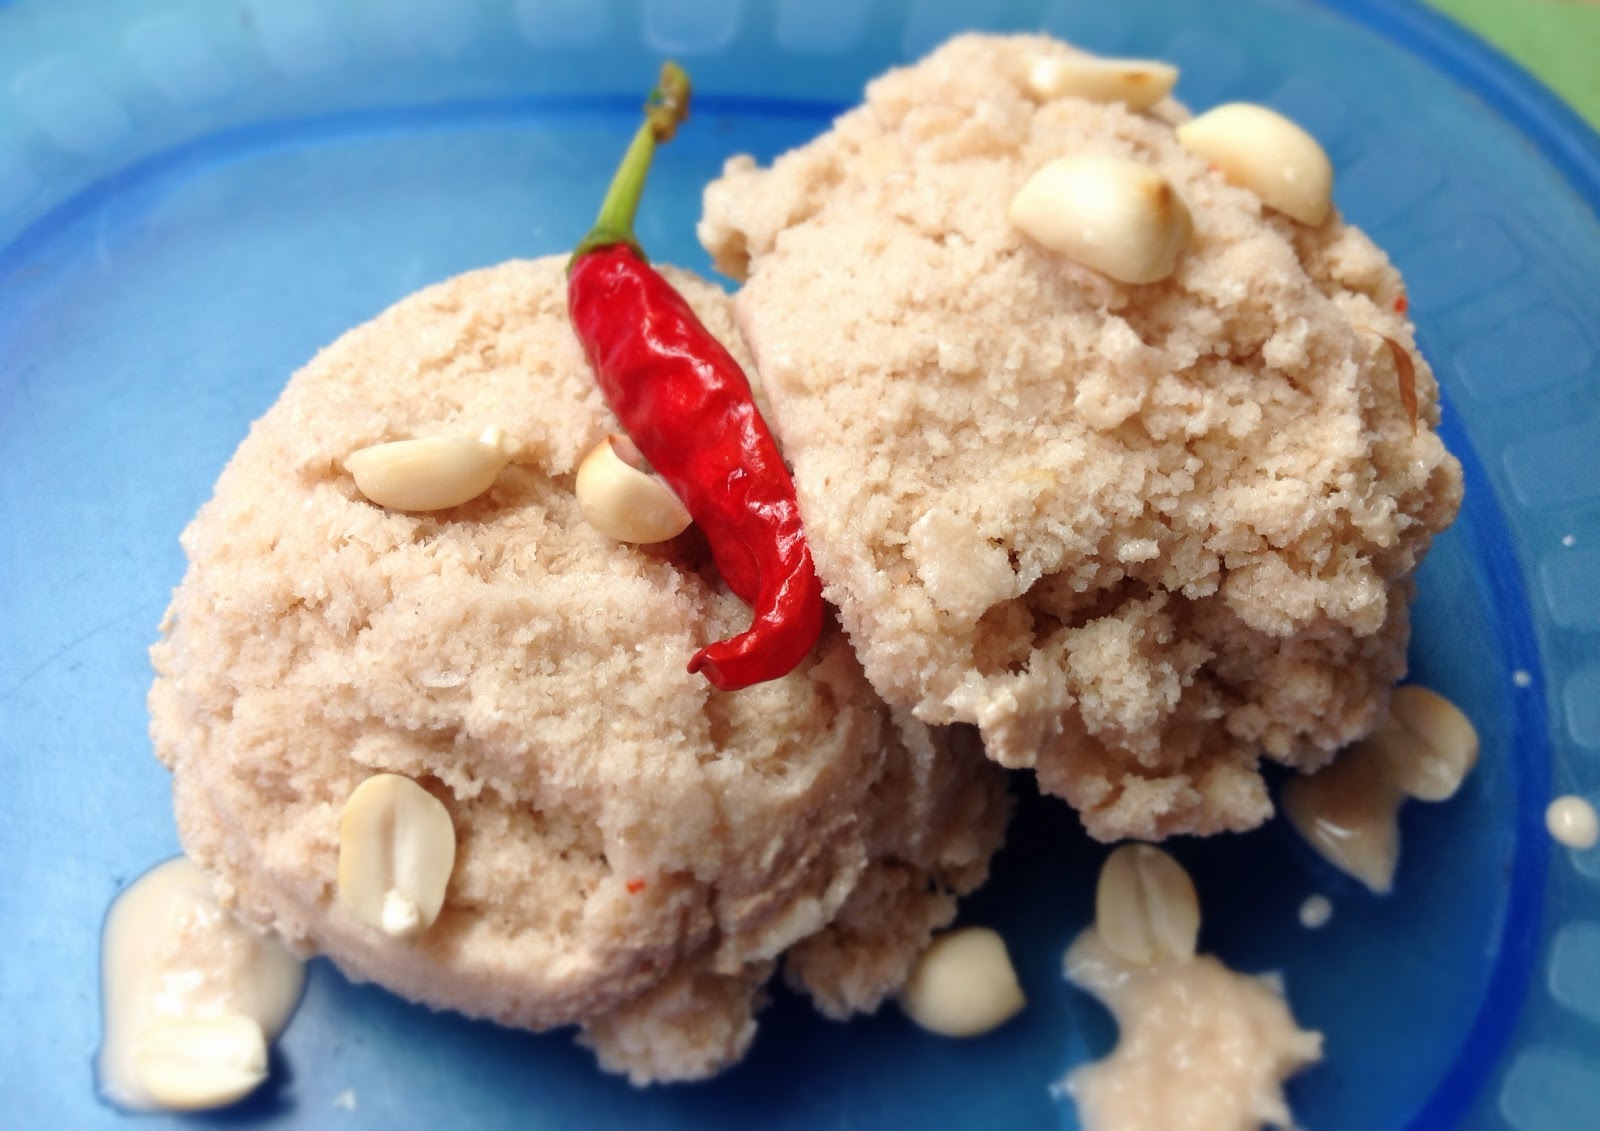
Spicy Peanut Sauce Ice Cream

Spicy peanut sauce is the *best* dip in the whole wide world. I can never get enough of it!!! So it just made sense that my first savoury ice cream was based on it. :)

This ice cream is on the crunchy, icy side but the texture suits the flavours well. It is super easy to make too.

I've used just two chillies because the ones I grow in my Veganic Terrace Garden are super spicy. You can adjust the quantity depending on the kind of chillies you get your hands on.

Spicy Peanut Sauce Ice Cream!!!

100 g Peanuts
100 g Jaggery
1/2 t Salt
1/2 t Tamarind Paste
2 Chillies
4 Garlic Cloves
1 ltr Water

- Toast the peanuts and let them cool
- Grind all the ingredients together into a creamy paste, with a little water
- Add the remaining water and blend well

- Freeze according to your ice cream maker's instructions
OR
- Transfer to airtight box and freeze for 8-10 hours
- Blend again
- Refreeze for another 8-10 hours

- Scoop and enjoy! :)

Spicy Peanut Sauce Ice Cream

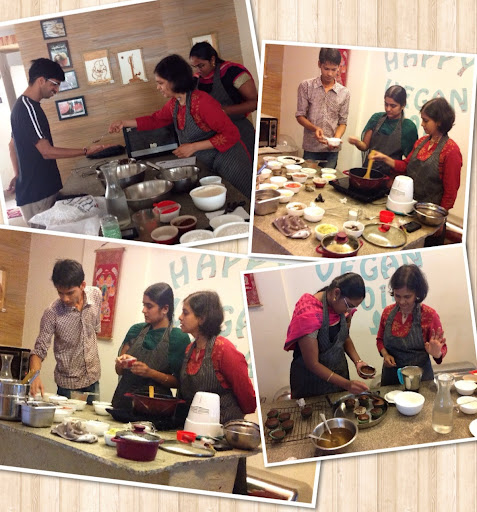
Before I signed off last Wednesday, I promised you pictures from my baking and cooking workshops at Carrots. Here they are...

On Thursday, 4th September I first had a Decadent Cakes baking class, followed by a session on cooking an Oil-Free Healthy Indian Meal:

Baking & Cooking Classes

On Friday, 5th September I had a workshop on Sweet Soulful Breads:

Baking & Cooking Classes

I love teaching and I find that I'm always in my element during my classes. I'm so grateful that I now have a beautiful space like Carrots to conduct these workshops. I don't have to be stressed out about the prep work. All I need to do is hand over a list of ingredients and my boys from the kitchen set things up perfectly for the class!

And having the service guys from downstairs nearby through the sessions is very helpful too. Anything I might need gets brought to me in a matter of minutes. At the end of a lengthy session of standing and talking, I'm about ready to crash. It's a huge blessing to be able to just sit down and relax while the clean-up gets done by my helpful team mates. :)

I'm looking forward to doing more and more of these one-on-one workshops and some group demos too. If you'd like to attend one of my Vegan Kitchen Ninja Series workshops, check out the list of classes here and schedule your private session.

I'll leave you now with a bonus recipe video that we shot at Carrots on Thursday. Here, Gokul and I show you how to make a quick, easy, healthy, oil-free Coconut Mint Rice. Enjoy! :)

Saturday, May 11, 2013

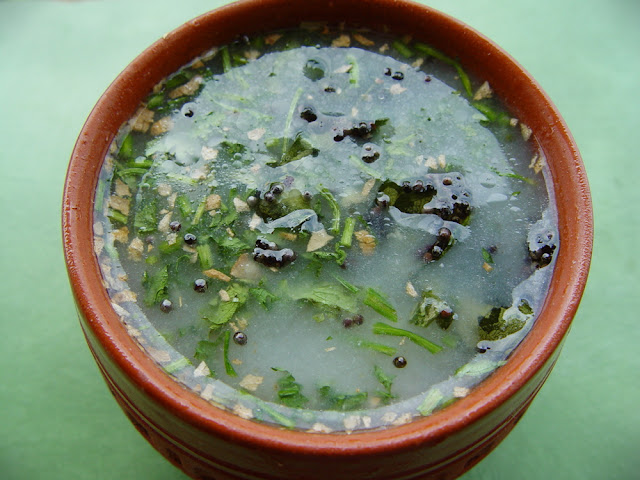
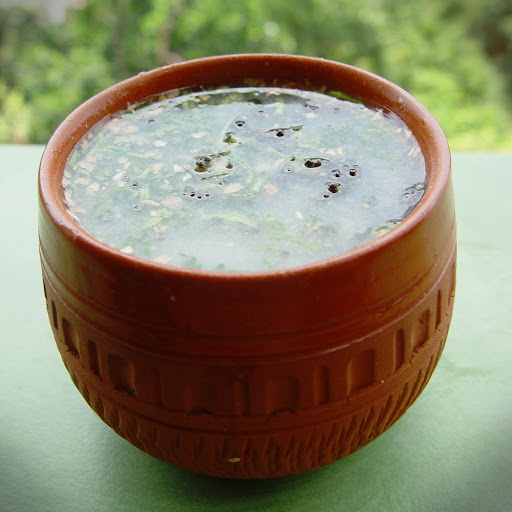
Rice Mylk Majjige - Spicy South Indian Buttermylk for Virtual Vegan Potluck 3.0


Rice Mylk Majjige - Spicy South Indian Buttermylk for Virtual Vegan Potluck 3.0

It's Virtual Vegan Potluck time once again! Wheee.

If you have been following the VVP blog route, you have arrived here from Veggie4ayear. You can click on the "Go Back" button below to go back to her VVP blog post which is the first in the Beverages category.


I took part in the VVP for the first time last November. I made Hot Spiced Chai with Cashew/Sesame Mylk which was voted as the Award Winning Recipe in the Beverage Course and got featured on the VVP blog last month. I even got a cool VVP Tee. :)

This VVP, I'm back with another Beverage offering, complete with a step-by-step HowDo tutorial. Spicy South Indian Buttermylk made of Rice Mylk.

Rice Mylk Majjige - Spicy South Indian Buttermylk for Virtual Vegan Potluck 3.0

Buttermilk/Moor/Majjige is a quintessential South Indian beverage. It's made out of yoghurt that's been blended with water, flavoured with lime and spices and seasoned. As I mentioned in my Peanut Curds post, the first thing a South Indian does when they turn vegan is to look for a vegan yoghurt alternative to make Curd Rice. More often than not, vegan Buttermylk is the very next thing curds get turned into.

Cold Majjige is one of the most delicious things to sip on a hot summer's day. It's spicy and soothing all at the same time. It is chock full of beneficial bacteria which are extremely soothing for your tummy and help to beat the ushna (body heat) that is generated because of all the mangoes you've been indulging in during the summer months. :)

I really like the gingery, mustard-y goodness, but it can also be prepared in a more simple and non-spicy way by just blending the curds with water, ice (optional), salt and lime. It's pretty tasty that way too.

You can start with any packaged or home made plant based yoghurt - soy, peanut, cashew, oat, rice... It just has to be absolutely plain - unflavoured and unsweetened. I've made this one with Rice Mylk that I turned into curds by adding a few cups of rejuvelac and letting it ferment overnight. Since Rice Mylk is already watery to begin with, I feel it suits the Buttermylk recipe well. And the starch in the rice makes the end result extra soothing.

Now on to the step-by-step How-Do recipe for Rice Mylk Majjige. Enjoy! :)


To continue on the VVP path, you can click on the "goforward" button below to be taken to Gazing In's VVP post, which is also a Beverage.


Or if you want to go to the beginning of the whole list of 169(!!!) blogs which are participating this time in the Virtual Vegan Potluck, you can find them on the host site Vegan Bloggers Unite.

Thank you AnnieSomerLidiaJason and everyone else behind VVP for making this awesome event possible! :)

Tuesday, October 16, 2012

Kandu Unde Vegan MoFo day 11


Two weeks down, two more to go. Yeah baby! Vegan MoFo seems to be going too fast and too slow, all at the same time. I know that sounds nutty, but as everyone knows, MoFo is all about turning people into kooks (cook/kook get it?). hehehe There's no other event which can be SO MUCH fun for me and at the same time drive me up the wall!!

With or without yooouuuuu,
With or wiiiTHOUt you oh oh,
I can't liiiivee,
With ooor withouuuut youuuu,
Oh Vegan MohhhFohhh

While you curse me and say, "now I'm going to have that song stuck in my head all day!", let me pacify you with today's yummy appetizer recipe. :D

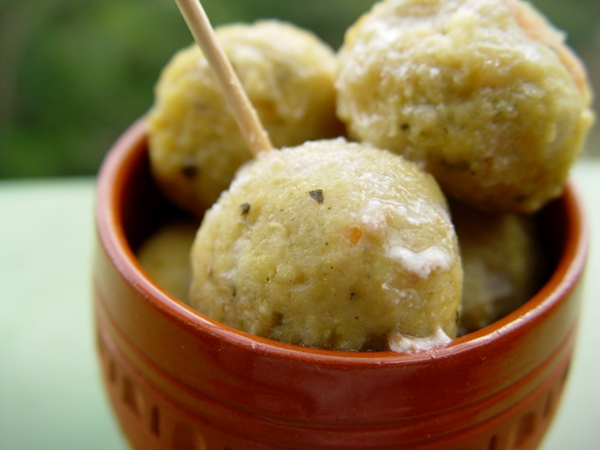
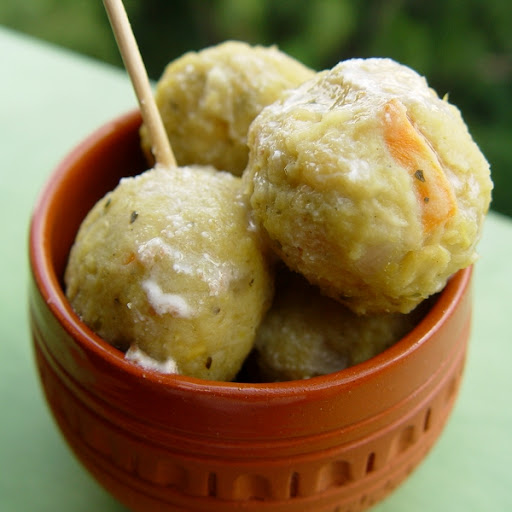
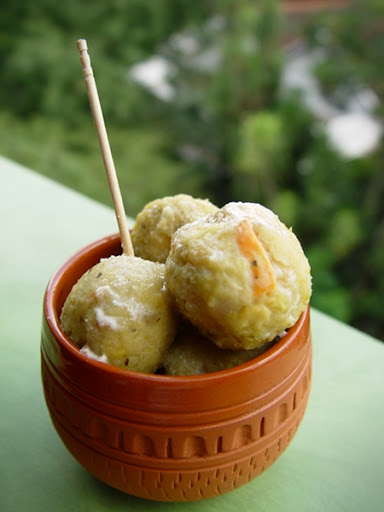
Kandu Unde

Kandu Undes (translation: Pigeon Pea Balls) are South Indian, lentil based, steamed dumplings made mainly in Karnataka during Ganesha Chaturthi. Traditionally they don't contain veggies but I like adding some in mine. When these are made on the day of the festival, onions are not added since onions are considered non-spiritual and cannot be used in foods which are prepared as offerings to Ganesha (or any other Hindu Gods/Goddesses). So I like making them on other days because they taste much yummier with onions in them. :)

Kandu Unde

Kandu Unde aka Kandunde

1 C Toor Dal (split pigeon peas)
1 C Channa Dal (split chickpeas)
1/2 C Moong Dal (split mung beans)
1/4 C Urad Dal (split black gram)

10-12 Spicy Green Chillies
1 inch Fresh Ginger
1/4 tsp Asafoetida
Salt

3 Onions - finely chopped
1 Carrot - finely chopped
5-7 Green Beans - finely chopped
2 T Cilantro - finely chopped
1 T Curry Leaves - finely chopped

In a small bowl soak Urad Dal for 5-6 hours.
In a larger bowl soak Toor Dal, Channa Dal and Moong Dal together for 5-6 hours.
Drain all the dals well.
Grind the urad dal along with the green chillies, ginger, asafoetida and salt into a thick, smooth paste.
Add the other dals and grind to a coarse mixture without adding any water (it shouldn't become smooth).
Mix the chopped veggies and herbs and form a sticky yet shape-able dough.

Heat water in a steamer.
Grease the steamer tray(s) lightly with oil.
Form 1 inch balls of the dough and place them in the tray(s), about 1/2 inch apart.
Steam for 5 minutes.
Let them sit in the steamer for 2-3 more minutes.

Place the steamed balls in a bowl and drizzle with peanut yogurt.
Serve hot.

Or, they can also be soaked in any vegan yogurt that has been spiced with chilli powder, salt and asafoetida for a few hours, chilled and served.

Enjoy! :)

Kandunde

Thursday, October 11, 2012

Masala Mandakki Vegan MoFo day 9


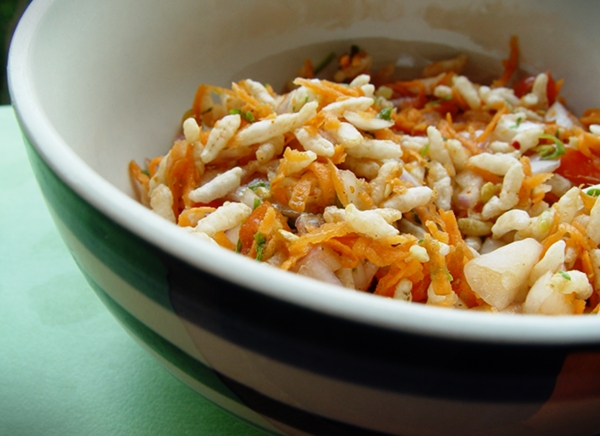
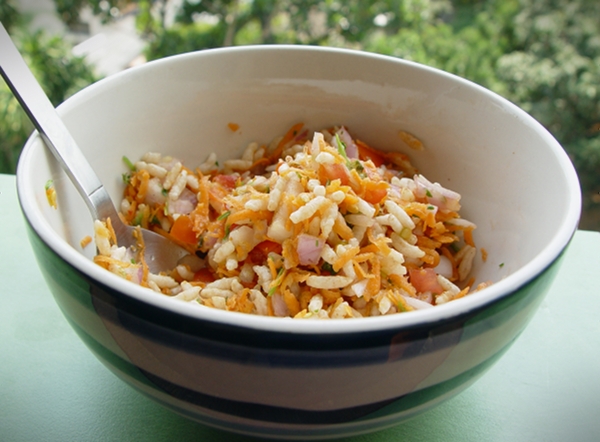
Isn't it awesome when you think you're indulging in a mid morning snack, except the snack just happens to be really healthy? Today's recipe is a salad that's under the guise of a snack. We have a huge variety of street cart foods in India and most of them are vegan. Masala Mandakki aka Churmuri happens to be one of them.

It's a salad made of some basic fresh veggies and Masalas (spices) tossed together with Mandakki (puffed rice). Since the puffed rice plays a key role in the dish, it's called Masala/Masalé Mandakki. It's very common to find it being sold on food carts outside schools, in public parks or even on streets with a lot of pedestrian traffic. The food cart guy tosses it together in a big steel mixing bowl right in front of you. It's usually served in a sheet of newspaper that's been rolled up into a cone and lined with a banana leaf to protect the food (at least most of it) from touching the paper directly. Masala Mandakki has to be eaten as soon as it's made because if left to sit around, the puffed rice gets soggy.

Masale Mandakki

Masala Mandakki carts are more common in South India, especially in our state of Karnataka, than they are elsewhere. They are different from Chaat carts which sell things like Bhel Puri, Masala Puri, Paani Puri, Samosa Chaat etc...

Firstly there is no cooking or heating done on the Masala Mandakki carts. Secondly, each dish has a higher quantity of fresh vegetables (carrot, onion, tomato, cilantro..). Thirdly, the number of deep fried elements involved is lower.

I wanted to go out today and grab some pictures of my favourite Masala Mandakki cart but I wasn't able to get out because I've been feeling kind of zombie-fied all day. Maybe at some point in the future I'll do a special blog post about them and all the other goodies that they make, like Tikki Puri, Tomato Masala, Nippat Masala, Mango-Pineapple Masala etc...

For now, I thought I'd share the recipe for the version I make at home whenever I don't feel like going out. I hadn't planned on this being today's MoFo post but late this morning I had a craving for Masala Mandakki and the moment I made it, I realized it goes with this week's theme and since it's one of my favourite salads to begin with, it just made total sense to make it my recipe for today.

Masala Mandakki

Masala Mandakki aka Masalé Mandakki aka Churmuri

Note: If you can't get your hands on puffed rice, then you can use any rice crispies style cereal, in which case, eliminate the sugar from the recipe.

1 C Puffed Rice
1 Tomato - chopped
1 Onion - chopped fine
1 Carrot - grated
1 T Fresh Cilantro - chopped
2 Green Chillies - crushed
1/8 tsp Sugar
1/8 tsp Sambar Powder or Red Chilli Powder
1/4 tsp Tamarind Paste
Lime Juice
Salt

In a big bowl mix everything, except the puffed rice (use your hand and fingers to mix for best results).
Add the puffed rice and mix quickly.
Serve immediately.
Enjoy! :)

Churmuri

Monday, October 08, 2012

Carrot Hesarubele Kosumbari - Vegan MoFo day 6


Hello everyone! Hope you all had a wonderful, drool-alicious weekend visiting various MoFo-ers blogs and also coming up with more delicious vegan food posts for your own. I'm really looking forward to blog hopping and seeing what you all come up with for week two of Vegan MoFo! :)

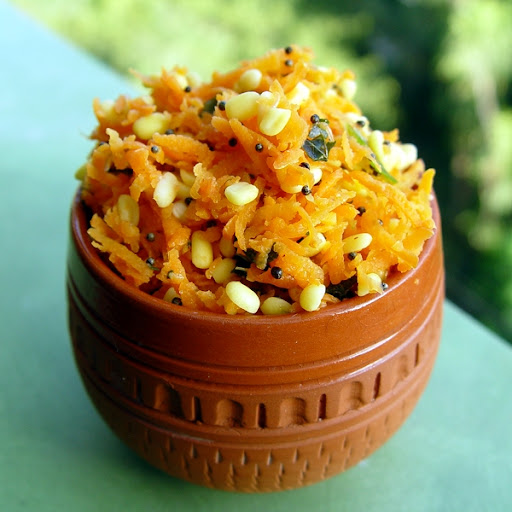
My last week's theme was Desserts. This week it's Soups and Salads. I'll start off with a traditional, South India Kosumbari - a salad that is topped with a basic Indian tempering of mustard seeds, curry leaves and asafoetida that have been heated in oil. Kosumbaris can be made with different combinations of veggies and soaked/sprouted lentils/beans.

They are one of the first few things which are served on the Banana Leaf 'plates' during meals at traditional events like festivals, weddings etc...

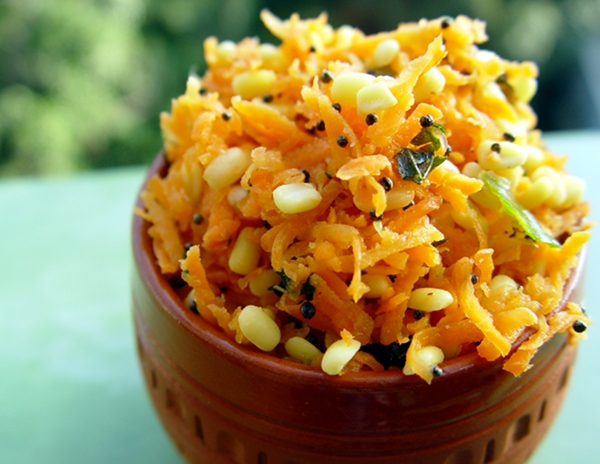
Today I'll be sharing a quick and simple Carrot Hesarubele Kosumbari. Hesarubele is the Kannada word for Moong Dal (Split Mung Beans). It a lentil that can be enjoyed raw. It's healthy and tasty.

Carrot Hesarubele Kosumbari

Carrot Hesarubele Kosumbari

For the salad:

1/4 C Moong Dal (soaked for at least 2 hours and drained)
3 large Carrots (grated)
2 Green Chillies (crushed)
Salt
Lime Juice
A pinch of Turmeric

For the tempering:

2 tsp Coconut Oil
1/4 tsp Mustard Seeds
1 T fresh Curry Leaves
1/8 tsp Asafoetida Powder

Mix all the salad ingredients together in a large bowl.
Use your hand and squeeze everything lightly as you mix to get the spice, salt and lime juice into the carrots.

In a small pan, heat the coconut oil on high for 30 seconds.
Add the mustard seeds and cover the pan immediately (with a small gap to let the steam escape).
When the mustard seeds almost stop crackling, add the asafoetida powder and mix for a few seconds.
Add the curry leaves and stir for another 30 seconds or so.
Turn off the heat.

Now pour the tempered ingredients over the salad and mix lightly.

Serve immediately and enjoy! :)

Carrot Hesarubele Kosumbari

Wednesday, September 12, 2012

Navané Dosé - Foxtail Millet Dosas: guest post by Chinmayie of Love Food Eat


It was a lovely Friday afternoon in April, the day before the first Vegan lunch/demo at Graze, Taj. Himani and I were lounging on bar stools and sipping on green tea. In the open kitchen we were facing, Uday was chatting with us while preparing scrumptious vegan dishes for us to taste for the next day's event. He told us that a food blogger was coming by soon to review the vegan menu on her blog. I remember thinking it'd be nice to meet another local food blogger in person.

The blogger was Chinmayie of Love Food Eat and she arrived at Graze with her husband and her adorable daughter. When I went up and introduced myself, she immediately said, "I visit your blog. A lot!" and then she called over her hubby and said, "you know that vegan blogger I was talking about on the way here? It's her". I was not expecting that at all and needless to say, I was totally flattered. :)

We didn't get to talk much that day because both of us were busy with having lunch and taking photographs. We just exchanged cards and spoke about how we should cook together sometime. It was only after coming back home and visiting her beautiful blog for the first time did I begin to learn about Chinmayie and her work.

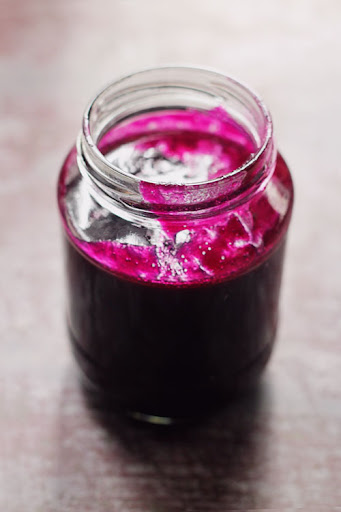
Chinmayie is a vegetarian, but a very large portion of her recipes happen to be vegan. Like me, she is an intuitive cook. That means, instead of following recipes, she prefers to experiment with different ingredients and cuisines and whip up all kinds of interesting concoctions. Just look at this gorgeous, gorgeous Jamun Jam she invented!

Jamun Jam

Doesn't it make you want to dip your whole fist in and lick it up? :P

Over the past few months I've gotten to know Chinmayie better, mainly on our Foodies in Bangalore group on Facebook. She leans towards healthy cooking and is quite knowledgeable about plant based nutrition. And she is always interested to learn more about vegan cuisine and try out vegan recipes.

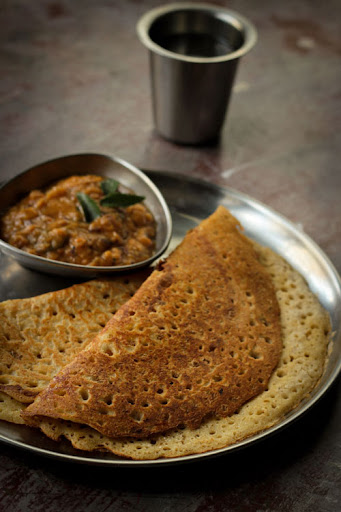
I'm very happy to have her here today with her Navané Dosé. Navané means Foxtail Millet in Kannada and in Karnataka, the word for Dosa is Dosé (the 'e' in both words is pronounced 'ay', as in - say, day, hay...).

Chinmayie has taken lovely shots of the ingredients and the steps involved in making these crispy Foxtail Millet Dosas. Thank you for being here Cinnmayie! :)

Let's move ahead to her guest post now...

--

Navane Dose

Hey All! This is Chinmayie from the blog Love Food Eat. I am here with a guest post for Susmitha's blog.

I have been seeing Veganosaurus from a long time, even before I started blogging. I initially came across her super cool miniature clay sculptures and beautiful jewelry which then lead me to her vegan food blog. I finally met her at a local restaurant recently in a vegan food event. The first words to slip out of my mouth were 'I am a big fan of you and your blog!'

Let's come to the recipe now. Those who know me and my blog, already know my love for millets. I have been working on adding more millets to my diet for more than just health benefits associated with it. While I enjoy them in most forms, my husband and daughter haven't really liked it much. They definitely prefer rice over millets in our daily meals.

A lot of people find it hard to figure out where to start. I also understand that if you are a rice+rasam loving South Indian like me, it'll be hard for you to include a foxtail millet salad into your everyday menu.

Foxtail Millet

I noticed that it's always easier to start liking a new ingredient when it is used in a familiar way. We all love our good old south Indian breakfast staple dosas. We never get tired of them. I grew up eating all kinds of different dosas, not just the rice+lentil kind. We made dosas out of plantains, jackfruit, cucumbers, water melon rind, tender coconut, wheat, finger millets and a lot more… some sweet, some spicy and everything in between. Having eaten all those different kinds, I was sure foxtail millets would work perfectly in a dosa and I wasn't wrong.

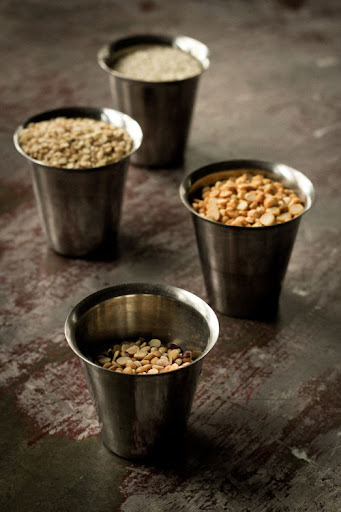
Dosa Ingredients

If you wanted to include foxtail millet into your diet and wasn't too sure about using it in its whole form, try this dosa recipe. It works like a dream and tastes super good. You can eat them not just because they are healthy! I served my dosa with some sambar but even a simple coconut chutney will be good.

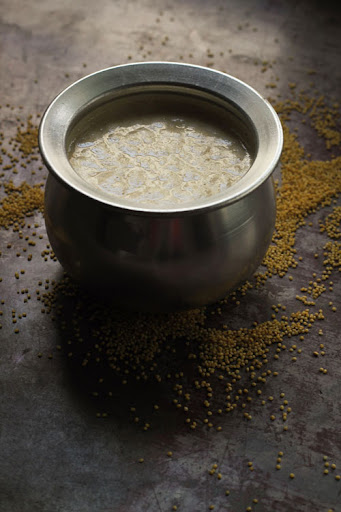
Dosa Batter

Notes:

You should be able to skip the rice altogether and make the dosas with just millets+lentils also.

Add green or red chilies, cumin, coriander seeds, cilantro leaves etc... while grinding the batter for more flavor.

You can also add grated vegetables and greens to the batter and make thick, pancake like dosas.

If you live in a cooler climate, cover the batter with something warm to help it ferment better.

Left over batter can be refrigerated and used for 3-4 days.

Dosa Roasting

Ingredints:

Foxtail millets - 2 cups

Rice - 1/4 cup

Channa dal - 1/4 cup

Urad dal - 1/4 cup

Toor dal - 1/4 cup

Chopped onion - 1/2 cup

Ginger - 1 inch piece

Salt


Combine the foxtail millet with rice and all the lentils and wash them once. Soak them in clean water for 3-4 hours.

Drain the water fully and place them in a blender with onion, ginger and salt and blend it into a smooth paste. Add enough water to get the batter to a thick pancake batter consistency. Cover and let it ferment for 8-10 hours (or overnight).

After 8-10 hours or the next day, the dosa batter would have fermented well. There might be small little bubbles on the surface and it might smell slightly sour. Mix the batter well.

To make the dosas -

Heat a griddle well, brush it with a thin layer of oil. Pour a ladleful of batter in the center and spread it into a dosa with the help of your ladle. You can either make it thick like a pancake or thin like Crêpes.

When one side of the dosa looks lightly cooked with small bubbles on top, apply a little bit of oil and flip it.

Once ready, serve it with sambar or any kind of chutney.

Yummy Dosa

Friday, August 17, 2012

Vegan Gokulashtami: Uppu Seedais and Vella Seedais


While I was growing up, Gokulashtami was a small festival, with a couple of very simple dishes for naivedhyam. It was only after I married my Iyer boy that I discoverd these crunchy, delicious, deep friend snacks called Seedais.
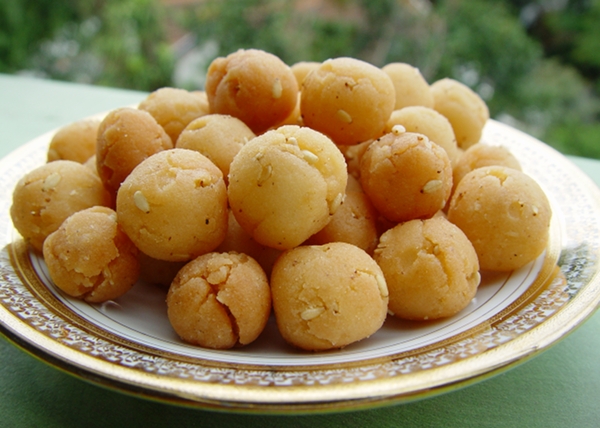
vegan uppu seedais

Hubs and I are not very religious and our poojas are always very quick, but we do enjoy the cultural aspects of our traditional Hindu festivals. And of course the food! :)

On our first Gokulashtami back home in Bangalore, hubby insisted that we make Uppu Seedais and Vella Seedais together and make baby Krishna footsteps kolam too. It was so much fun that it became a yearly tradition for us. Now, as long as we're here in Bangalore during Gokulashtami, we don't miss out on celebrating it in our small way.

vegan vella seedais

Now after so many years, I've become fairly good at making the Seedais and a pro at shaping the footsteps out of rice flour paste.

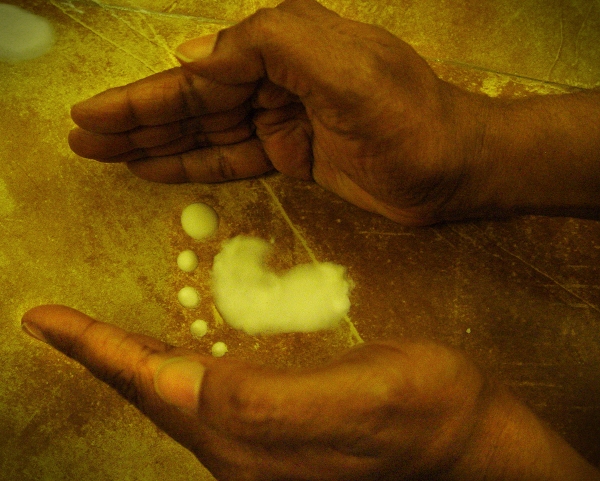
cute baby krishna footstep kolam bangle handstiny baby krishna footstep gokulashtami

People often take the easy way out with the kolam by just drawing an 8 with a flattened top and quickly putting dots for the toes, but we always insist on using the more traditional, side-fist method. Takes a bit more patience but it's worth the effort. Clench palms into tight fists, dip them in rice flour paste and press them onto the floor, right fist for the right foot and left fist for the left foot, then finally dot the toes on top with the index finger. If there are real little babies at home, then their wee feet are used as the tools for making the footsteps. :oP

running baby krishna janmashtami footsteps on floor

For those who have no clue about what I'm talking about, Gokulashtami aka Krishna Janmashtami is a festival in celebration of Krishna's birthday. The little footsteps on are drawn from the main door of the house, all the way up to the pooja chamber/altar. They represent baby Krishna running into our home happily and jumping up onto his place in the altar in front of the yummy food offerings. The idol on the altar is of an adorable baby Krishna in a little cradle.

gokulashtami baby krishna footsteps on pooja altar

All Hindu festivals basically involve these steps: prepare the favorite foods of the God or Goddess who is being celebrated and place said food on the pooja altar, in front of the idols/symbols/pictures which represent the deity. Light Lamps of sesame oil and incense sticks with a pleasant, calming fragrance. Chant ancient prayers (this part of the ritual could be long or short and would involve ringing a brass or silver bell and lighting a few pieces of camphor on fire to purify and cleanse the house). Next, express gratitude for our many blessings. Offer the naivedhyam food to the God or Goddess in question. And finally proceed to gleefully stuff our faces with the delicious festival goodies.

Little Krishna is known for his love of butter and curds, but we believe that if he lived on Earth today, he would definitely be vegan because he loved cows with all his heart and would never put up with the cruelties inflicted upon these gentle creatures by humans to satisfy our greedy desires. So of course all the goodies we prepare are completely vegan.

This year I made Tapioca Payasam, Vella Appam, Uppu Seedai and Vella Seedai.

gokulashtami vella appams

For the Vella Appams, I followed the recipe from Subbu's Kitchen. Instead of deep frying them however, I shallow fried them in my Paddu/Paniyaram Pan. This helped them hold their shape well.

For the Uppu Seedais and Vella Seedais, I followed the recipes from Chefinyou, with a few modifications.

Uppu Seedais

Uppu Seedais are known to be tricky little buggers. I've heard that they often turn into little bombs while being fried and splatter oil all over the kitchen. But thankfully, my little Uppu Seedais have always been very well behaved. It's possibly because I use coconut oil instead of butter and dry coconut instead of fresh coconut, which reduces the moisture content in the balls, hence drastically reducing the risk of air pockets being formed inside. Or perhaps it's simply vegan karma at play here. :oP

vegan uppu seedais

1 C rice flour
2 T urad dal flour - I followed this recipe to make it and sieved through a cheesecloth to get a very fine powder
1/4 C white sesame seeds
1/4 C dry/desiccated coconut powder
2 T coconut oil
1 tsp asafoetida powder
Salt to taste
Additional coconut oil for deep frying

Mix all the ingredients together.
Add a little water at a time and form a stiff dough.
Shape the dough into small, about 10mm thick, balls.
Heat the coconut oil for a couple of minutes and drop the balls into it in batches.
Fry them on a medium flame and stir once in a while to ensure even cooking.
After a couple of minutes, the balls will turn to a light, golden colour.
Remove them with a slotted spoon and place them on tissue paper to absorb excess oil.
Enjoy! :)

Vella Seedais

vegan vella seedais

1 C rice flour
2 tsp urad dal flour - I followed this recipe to make it and sieved through a cheesecloth to get a very fine powder
1 T dry/desiccated coconut powder
1/4 C white sesame seeds
1 cup jaggery - dissolved in 1/2 C of hot water and strained
1 cardamom pod's worth of crushed seeds
Small pinch of salt
Coconut oil for deep frying

In a dry, heavy bottomed pan, roast the rice flour on a low flame for a minute or so, being careful not to burn it and set aside.
Lightly toast the sesame seeds and coconut powder.
Mix everything, except the jaggery syrup, in a large bowl.
Slowly knead in the jaggery syrup and form a stiff dough, using only as much jaggery syrup as required.
Cover the bowl with a plate and set aside for half an hour.
Shape the dough into 1 inch balls and keep aside.
Heat the coconut oil for a couple of minutes and drop the balls into it in batches.
Fry them for a few minutes on a medium flame and stir once in a while to ensure even cooking. If the balls brown too quickly, reduce the heat a little more.
They are done when they turn to a dark golden brown colour.
Remove them with a slotted spoon and place them on tissue paper to drain away any excess oil.
Enjoy! :)

Saturday, April 14, 2012

Vegan Avial South Indian Yogurt Vegetable Stew


We have various festivals in India which mark the start of a New Year. People from different states and languages mark the beginning of their year based on moon cycles, star cycles, seasons etc. Two weeks ago we had Ugadi here in the state of Karnataka. We celebrate this every year at my parents place where we do the customary eating of "bevu bella". The neem flowers (bevu) are bitter and the jaggery (bella) is sweet. We mix them in a little plate and place it at the holy altar and begin our day by eating a large pinch of this mixture while saying "neem is sweet, jaggery is bitter". This is to signify our acceptance of all bitter experiences and sweet experiences that life throws at us as equal and that without either, life would be incomplete.

After this, we proceed to stuff our faces with delicious festival foods. This year my mom and both my grandmas together made a bunch of stuff, the key ones being maavinakai chitranna (mango and lemon based rice dish), holige saaru (a sweet and sour liquid that we mix with rice and slurp) and holige/obbattu a thin flatbread made of semolina and flour, stuffed with a sweet lentil and jaggery mixture.

I didn't take pictures of any of these because I was too busy enjoying myself with my family and stuffing my face that day. But on hindsight, I did feel bad that I didn't capture everything to share here.

So I decided that since yesterday was the Tamil New Year festival which hubby and I celebrate here at home, I should share at least one recipe with you all.

Avial, is a special South Indian stew (hailing from the states of Tamil Nadu and Kerala) of vegetables simmered in a spicy coconut and yogurt based sauce. It's a very simple recipe but takes time to make because of all the vegetable cutting involved. Traditionally vegetables like yam, drumstick, plantain (raw banana) which are native to South India play the main role in Avial. Other than these potatoes, carrots, french beans and peas are included. Veggies like capsicum (bell peppers), radish, beets, turnips etc... are avoided because they change the texture completely (being very soft when cooked) and don't go well with the yogurt base.

This is what went into my Avial yesterday (I didn't have plantain and drumstick on hand otherwise I'd have definitely included them).

Avial

3 C Vegetables cut into long (approx 1 inch) pieces - yam, carrot, beans, potato, baby corn, peas
1/4 tsp Turmeric
Salt

5-6 Green Chillies
1/4 tsp Cumin
1 inch piece Ginger
2 C Dry Coconut Powder (grated fresh coconut is even better)

1/2 tsp Mustard Seeds
Curry Leaves
1/8 tsp Asafetida Powder
3-4 Dry Red Chillies (each broken into 3-4 pieces)
Coconut Oil

1/2 C Vinegar
1/4 C Lemon/Lime Juice
2 C Peanut Yogurt

Toss the chopped veggies in turmeric and some salt and steam them until tender (about half an hour).

Grind the coconut, ginger, green chillies, cumin and a little more salt together into a paste using water as required.

In a large, heavy bottomed vessel heat a few tablespoons of coconut oil and add the mustard seeds and cover loosely. As soon as they have stopped crackling (half a minute), add the dry red chillies, curry leaves and asafetida.

Add the steamed vegetables and spicy coconut paste and mix together. Add a cup of water, cover and simmer everything together for a few minutes.

Turn off the flame and mix in the vinegar, lemon juice and peanut yogurt. Taste and adjust the salt and sour ingredients.

Serve over steamed rice.

Enjoy! :)

--

Apart from the Avial, I also made two other things (these are old pictures that I clicked a long time ago though):

Jevvarisi payasam - a tapioca pudding of sorts.

Sabbakki Payasa

Parappu vada - spicy, deep fried fritters made of a combination of lentils which can be enjoyed plain or soaked in vegan yogurt.

curd parappu vada

I'll share recipes of these at some other point. For now, make yourself some Avial and enjoy! :)

Friday, February 24, 2012

Steamed Ragi Sweet, my guest post on Tongue Ticklers.


Steamed Ragi Sweet, my guest post on Tongue Ticklers.

Want to know what that is and how to make it? Check out my guest post on Tongue Ticklers (that website has unfortunately disappeared now).

Tongue Ticklers is a vegan blog run by Harini. It's filled with beautiful food photography, interesting recipes and lots of handy tips on vegan and gluten free cooking and baking. I'm super happy to have a guest post featured on it. :)

Tuesday, November 01, 2011

Sambar for Idli - Vegan MoFo Post 19


A bonus post. I guess this is my way of holding on to Vegan MoFo and prolonging the last day. :oP

My first recipe for Vegan MoFo 2011 was for Idlis. I thought it would be apt to end the month with a recipe for Sambar which is commonly served with Idlis.

There are a few different authentic South Indian recipes for homemade Sambar and I enjoy the taste of most of them. The one I'm about to share with you is a quick and simple one.

Sambar

2 C Mixed Vegetables - Carrots, Beans, Potatoes, Chow Chow (Chayote), Peas, Radish etc...
1 Large Diced Onion or 15-20 Peeled Sambar Onions (Shallots) - this is optional
2-3 Diced Tomatoes
1/2 C Toor Dal
1/4 tsp Turmeric Powder
2-3 tsp Sambar Powder (this spice mix tastes best when home made but it is also commercially available in the masalas section of Indian grocery stores)
1-2 tsp Tamarind Paste
1 tsp Jaggery
Salt
For the seasoning: Coconut Oil, Mustard Seeds, Curry Leaves, Dry Red Chillies (broken into halves), Hing (Asafotedia)

Wash and dice the vegetables. Wash the toor dal thoroughly. Bring 3-4 C of water with the turmeric to boil in a pressure cooker. Add the toor dal, vegetables and a small pinch of salt and pressure cook for 5-10 minutes (depending on your pressure cooker). Let it cool completely before opening the lid.

Meanwhile heat 1-2 tsp of the coconut oil in a deep pan. Add mustard seeds and let them crackle for a few seconds. Add the remaining seasoning ingredients. Add the onions/shallots and stir fry until they are tender. Add the sambar powder, tamarind paste, jaggery and salt and mix well. Add the tomatoes and turn off the heat. Cover and keep aside.

Once the vegetables and dal have cooled, add the tomato mixture and bring everything to a boil. Reduce the flame and simmer for a few minutes to allow the flavors to blend. Taste and adjust.

Serve hot ladled over Idlis or cooked rice.

Enjoy! :)

Wednesday, October 19, 2011

Khara Avalakki Dosa - Vegan MoFo Post 16


Due to a family emergency (all good now, thankfully) I skipped doing a MoFo post yesterday. But today I'm back in action with a yummy recipe for you. :)

Dosas are a South India staple dish. Dosa batter is made of lentils or grains (most commonly rice) or a combination of both. There are innumerable varieties of traditional dosas which range from crispy thin crèpes to soft and fluffy pancakes. Avalakki dosa belongs to the latter category.

This batter can be used plain or turned into Khara Avalakki Dosa by adding chopped and grated veggies, green chillies, herbs etc... It can also be poured into Paddu/Paniyaram moulds and turned into a different dish altogether.

Khara Avalakki Dosa

For the plain Avalakki Dosa:

1 C Uncooked Rice
1 C Thick Beaten Rice Flakes (Avalakki/Poha)
1 T Fenugreek Seeds (Methi)
Salt (Rock or Sea)
Thick Peanut or Soy Yogurt (optional)

Soak the rice, beaten rice and fenugreek seeds overnight in water or vegan yogurt or a combination of both in a wide vessel. There should be enough liquid to cover everything.

In the morning, grind them well into a smooth, thick batter gradually adding all of the soaking liquid plus more water if required.

Transfer to a large, airtight container (the batter should fill it only halfway through to give it space to expand), add salt and mix well with your hand.

Cover and let it sit in a warm place for 8-16 hours.

The batter will ferment and grow.

Heat a Dosa pan (Tava) or a flat frying pan.

Pour a ladleful of Avalakki Dosa batter onto the centre of the pan and drizzle with oil.

Cover and cook for about half a minute on a medium-high flame.

When uncovered, there should be bubbles and holes in the Dosa and the top should be cooked well.

You can optionally flip the Dosa over and cook on the other side too for a few seconds.

Remove the Dosa with a metal spatula and serve hot with chutney or pickle or curry.


For Khara Avalakki Dosa, stir in the following into the batter and proceed to cook on the same way as above:

Chopped Onions
Chopped Fresh Cilantro
Grated Carrots and/or Beets
Crushed Green Chillies
Asafoetida Powder (a pinch)
Soaked Channa Dal
Chopped Curry Leaves
Finely Chopped Coconut Pieces

You can also optionally top the batter with sliced tomatoes and then cook it.

All the above ingredients make for a delicious Khara Avalakki Dosa but you can choose to eliminate some of them or add your own stuff. Get creative. :) This is a very versatile batter.

What do you think you'd add to the batter?

Monday, October 10, 2011

Sundal and Payasam - Vegan Mofo Post 10


Last week we had a series of festivals called Dussera (also known as Navarathri). Traditionally we have ten days of celebration and this means lots of sweets and snacks. The most important of these festivals for us is Ayudha Pooja. It's a special occasion reserved to give thanks to all the tools, machines and vehicles we are blessed with.

On the day of Ayudha Pooja this year, hubby and I made a simple sweet and snack combination for Naiveidhyam (offering to the Gods and Goddesses). Something quick and delicious which we could eat and share.

Whatever is cooked with the intention of being placed at the altar as a food offering should only be eaten by us after the ritual is over. So while we prepare the food, we don't have the luxury of tasting and adjusting. But for some reason, every time we make Naiveidhyam food, it turns out perfect! This always reminds me that the taste of a dish is largely dependent on the energy and intention of love that goes into preparing it. Positive vibrations always yield beautiful results. :)

Sundal is a savory dish made of Garbanzo Beans/Chickpeas. We can use any kind of chick peas to make these but this time we had Kabuli Channa (the larger ones) on hand so we used them. I normally follow the quick soak method to soak pulses but this time I soaked them overnight.

Channa Sundal

1 C Dry Chickpeas
2 Chopped Green Chillies
2 tsp Coconut Oil
Mustard Seeds
Curry Leaves
Asafoetida Powder (a pinch)
Dessicated Coconut
Chopped Cilantro
Lime Juice
Salt

Wash and soak the chickpeas over night (about 8 hours). Throw out the water, add fresh water and steam for 45 minutes or pressure cook for about 15 minutes until the chickpeas are soft.

In a wide, heavy bottomed pan heat the oil. Add the mustard seeds and let them crackle. Add the chopped green chillies, asafoetida powder and curry leaves and stir for a half a minute.

Now add the cooked chickpeas and salt and a wee bit of the cooking liquid and cook on medium high heat while stir frying continuously. After about 5 mintues of this, once the water has evaporated, add the dessicated coconut and toss well and turn off the heat.

Mix in the lime juice and garnish with the chopped cilantro and serve hot.

--

Payasam is a liquidy dessert which is best eaten hot. It is served at the beginning of traditional South Indian meals.

Payasam can be made with many things - Rice, Dals, Tapioca, Semiya (fine semolina noodles), Broken Wheat etc... This time we made Channa Dal (Split Bengal Gram) Payasam.

Channa Dal Payasam

1 C Channa Dal
1/4 C Dessicated Coconut
1/4 C Grated Jaggery
6 tsp Sugar
1 T Chopped Cashews
1 t Raisins
2 Cardamom Pods (crushed well with a stone/hammer/mortar and pestle)

Soak the channa dal for an hour. Add dessicated coconut and steam (in the soaking water) for half an hour.

Meanwhile, dry roast the cashews to a golden color, add the raisins and stir for a few seconds, until they brown slightly. Keep aside.

Once the channa is ready, add jaggery and sugar and mix well. Bring to a simmer on medium heat and stir till the sugar and jaggery have dissolved. Add the crushed cardamom, lower the heat and simmer for a few minutes.

Turn off the heat and serve hot.

Saturday, October 08, 2011

Seasoned Peanut Yogurt Black Rice - Vegan Mofo post 7


We've come to the end of the first week of Vegan Mofo and I've successfully managed to post every single day! Woohoo!! :D

Over the past few months, I have found two great local sources of organic produce and grains. One was Pristine Nature, an online store I spoke about on my blog a few weeks ago and the other is In The Pink, a restaurant and bazaar which I will be featuring on my blog very soon.

At both these places, I have been able to obtain black rice which I have gotten addicted to. Pristine Nature sells Burmese black rice and In The Pink has a slightly different variety. But both of them taste equally delicious!

The rice cooks to a beautiful deep grape colour and a sticky texture. It's perfect to be mixed and had with liquidy stuff like sambar, rasam or dal and it works fantastically in stewy dishes like Bisi Bele Bath and Pongal. But my most favorite way to eat it is in the form of Seasoned Curd Rice made of Peanut Yogurt.

This is an exotic twist to a very traditional South Indian dish. :)


For the curd rice, mix together:

1 C Cooked and cooled Black Rice
1 C (or more if you like) Peanut Curds
1/2 t Vinegar/Lemon Juice
Salt

For the seasoning:

1/2 t Coconut Oil
1/4 t Black Mustard Seeds (Sasive)
1/4 t Cumin Seeds (Jeerige)
1 t Split Black Gram Dal (Uddina Bele)
1 t Split Bengal Gram Dal (Kadale Bele)
2 Green Chillies chopped into little circles
Asafoetida Powder (Ingu)
Curry Leaves (Karibevina Soppu)

Heat oil in a small, heavy bottomed pan for half a minute. Add mustard and cumin seeds. They will crackle so cover lightly for a few seconds. Add the dals and stir for a few seconds until they are lightly browned. Add the asafoetida, curry leaves and green chillies. Stir for a few seconds, turn off the heat and stir some more.

Add the seasoning mixture to the prepared curd rice. Mix well and serve.

Enjoy! :)


Notes:

Curd rice is traditionally eaten at the end of a spicy meal.

It tastes great after sitting around for a couple of hours because the curds will ferment and develop a light tangy taste.

You can add grated or finely chopped coconut, pomegranate, fresh grapes or raisins to this according to your taste preferences.

Sunday, October 02, 2011

Idli the fluffy South Indian Rice Cake - Vegan MoFo post 2


Idlis are a staple breakfast food in South India. These fluffy rice cakes are made by soaking, grinding and fermenting a combination of a specific type of rice and urad dal (split black gram). Adding a handful of methi (fenugreek) seeds in the mix makes the Idlis extra soft and fluffy.

AWESOME KITCHEN GADGET ALERT!!! :)

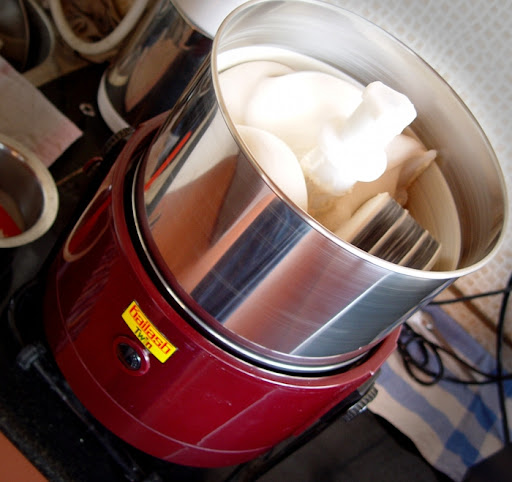
Idli Grinder

I use my trusty Kailash Tilting Wet Grinder to make a super smooth Idli batter. It has a motor unit over which the grinding vessel is placed. The inner base of the vessel has a granite layer. There is also a grinding attachment made of three granite stones which is placed into the vessel where it is held in place. When the machine is turned on the vessel starts to rotate which causes the stones to rotate in the opposite direction. No grain or lentil can hold the hope of staying whole under the pressure of those awesome stones. ;)

The tilting mechanism in my grinder makes it very convenient to pour out the batter without having to carry the weight of the heavy vessel.

For those who make Idlis just occasionally, a good blender with sharp blades will do fine. You just have to remember to soak the urad dal and rice separately and make a very smooth paste of the dal before grinding the rice (the methi seeds are soaked with the rice). But for someone who is looking to be a regular Idli pro, a wet grinder is would make for a very nifty gadget. It's been a truly worthy investment for me! :)

Idlis

Ingredients:

1 C Whole or Split Black Gram
5 C Short Grained Idli Rice (I also like to use Mulleri Red Rice for my Idlis sometimes)
2 T Fenugreek Seeds
Salt

Soak everything (except salt) together in plain water overnight.

Drain the soaking water into a vessel and keep aside.

Set up the idli grinder according to instructions, pour some soaking water into it and switch it on.

With the motor running, slowly add in the rice, dal and methi mixture.

Pour in some more of the water to ensure the steady movement of the grinding stones.

Cover the vessel with the lid and get online and blog for the next 20 minutes.

Look in on the batter and add more water if required (the batter should have a fairly thick but pourable consistency) and let the grinder run for another 15 minutes or so.

Once the batter is completely smooth turn it off and pour it into a large container (batter should fill it only halfway to allow it to expand while fermenting).

Add salt and mix lightly with your hand, cover and keep aside in a warm place for about 12 hours (more if you live in a cold climate).

Once the batter has risen well and attained a slightly sour smell, it is ready for use.

Ladle the batter into Idli mold trays.

Meanwhile, bring water to boil in a steamer and once it begins to boil place the Idli trays into the steamer.

Cover and steam for 8-10 minutes on medium heat.

You should be able to smell the cooked Idlis in the steam wafting out of the steamer.

Carefully remove the Idly trays out of the steamer and let the Idlis cool for a few minutes.

Gently unmold the Idlis using a wide, flatish spoon.

Drizzle sesame oil over the Idlis and serve them hot with Sambar or Coconut Chutney.

Enjoy! :)

Monday, September 05, 2011

Ganesha Chaturthi and Yummy Kadubus


I love a good, filling festival feast! But then, who doesn't? No matter what religious festival it is that one is celebrating, the love for the associated food is commonly shared. :)

It's probably because of a combination of the joyous childhood memories we have associated with festivals and the amount of care and hard work which always goes into making food fit for celebration.

Kadubu / Kozakottai

Being a strong believer in the power of spiritual vibrations, I feel that food when it's made with the intention of a offering to a deity as neiveidhya first before being eaten is most sublime.

Among all the festival we grew up celebrating, my fondest memories are of Gowri and Ganesha (not even Diwali with all its fire crackers matches up). For the first half of my life, I lived in a big, happy joint family. We were fourteen of us in one huge bungalow. All festivals were celebrated together, as a family.

On the first day was the Gowri pooja followed on the next day by the Ganesha pooja. The story is that Gowri comes down to Earth on that day to visit her mother and Ganesha (Gowri's youngest son) accompanies her to stay at his grandma's place. And grandma spoils him with all kinds of delicious goodies. After the festivals are done, a few days later Ganesha safely takes his mother Gowri back up to Kailasa (heaven). That's when we leave the clay idols in water as a send off until the following year.

A few days before the festival, when the adults purchased the larger Gowri and Ganesha clay idols for the ritual, they always purchased smaller ones for us kids.

Me, my little sister and our two little cousin brothers used to willingly and enthusiastically wake up at the ungodly hour of 4 am on both festival days, get dressed in traditional clothes and sit at our mini altar to do the ritual to our little Gowri and Ganesha. The girls did the Gowri ritual and the boys did the Ganesha ritual. We even had miniature silver vessels, aarthis and all the other stuff required for the ceremony. And at the end of the ritual, the feast was brought out and placed in front of the deities as an offering. This marked the end of the ceremony. After this, we could commence wolfing down the yummy goodies! :D

Those were such utterly joyful days!!

Ganesha after the pooja

Now hubby and I bring home only the Ganesha (I visit my mom's place and all my aunt's places on the day of the Gowri festival) and perform a simple, short pooja. But we do make sure to cook a whole bunch of the traditional delicacies for the neiveidhya offering so we can stuff ourselves later to our tummies' content. :D

This year we made three types of kadubus/kozakottais, unfermented idli with coconut cilantro chutney, sundal out of small, brown channa and these miniature steamed snacks (don't really know what they are called).

For the three kadubu fillings - coconut jaggery, sesame jaggery, savory urad dal - we followed the recipes from Subbu's Kitchen. For the outer rice dough covering we used a slightly different method.

Kadubu Dough

1 C rice flour
1 C water
2 tsp oil
a pinch of salt

Mix everything into a paste in a heavy bottomed pan and place on medium heat. Stir continuously (will take maybe 5-10 minutes) and let it cook until the paste starts coming together into a ball of dough.

Take the pan off the stove and once the dough cools a bit, dip your palm in cold water and knead the dough until it's smooth. Follow instructions to make various fillings, stuff and steam.

Kadubus / Kozakottais inside

Fun Little Savory Steamed Snacks

These are usually made out of leftover kadubu dough but I like them so much that I always make extra dough just for these. :)

Kadubu dough
1 tsp moong dal and 1 tsp channa dal (soaked together for half an hour)
2 fresh green chillies, asafoetida and salt (crushed well together)
2 tsp chopped fresh cilantro

Mix everything together.
Form into fun little shapes - ball, stick, ring, disk etc...
Steam along with the kadubu for 5-8 minutes.


Another Ganesha Chaturthi dish that I truly relish is Kandundes (didn't make them this time around though). They are made of four kinds of lentils soaked together and ground to a thick paste along with spices, shaped into balls and steamed. Then they are dunked in a yogurt based gravy and served. I make these on non festival days too because then I get to add onion (a festival no no) and also a bunch of chopped veggies. I either serve those in a vegan yogurt based gravy or just plainly spiced vegan yogurt. I'll share a recipe for those the next time I make them.

What goodies do you prepare for Gowri Pooja and Ganesha Chaturthi and which ones are your favorites?

Wednesday, March 30, 2011

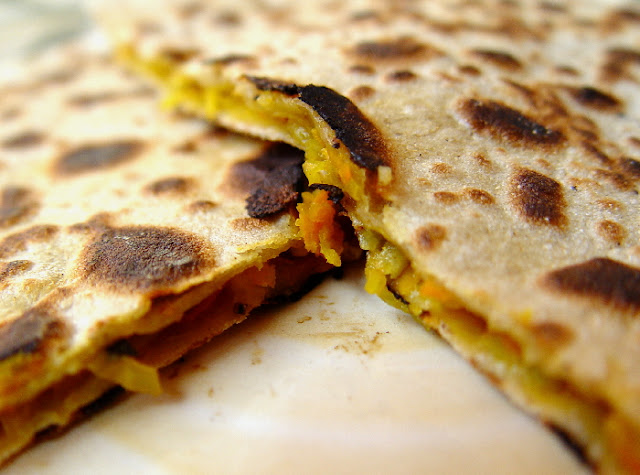
Carrot and Radish Stuffed Chapathis


Simple enough to make but OMG are these babies deeeelicious. Serve with a splosh of ketchup and a dash of Tabasco on the side and it's pure heaven! :)

Carrot and Radish Stuffed Chapathis

For the stuffing:

Grated Carrots
Grated Radish
Finely Chopped Onion
Crushed Green Chillies
Chopped Cilantro
Salt

Mix everything together and keep aside.

For the chapathi:

2 C whole wheat flour
2 tsp vegetable oil
salt

Mix everything together with a little water to form a ball. Knead till it reaches an elastic consistency. Pinch off equal sized balls and roll out into circles.

Stuffed Chapathis rolling and filling

Place one rolled out chapathi on a flat surface and spread some of the stuffing mixture on it leaving a little bit of space around the edges. Place a second chapathi over it and seal the edges by pressing together gently.

Roasting the stuffed chapathi

Roast both sides of the chapathi on a pan over medium flame until golden brown.

Serve hot and enjoy! :)

Well actually, I love these at room temperate too after they've sat around for a few hours because the layers soak up the flavors and get a little soggy. So these make a great lunch box dish!

Carrot and Radish Stuffed Chapathis